Wednesday 25 June 2014

Xilisoft iPhone Transfer Uninstall Error – How To Fix This?

Xilisoft iPhone Transfer is the all-around iPhone transfer software which can easily copy and export iPhone songs, video, photo, eBooks, audio books to PC/iTunes and import PC files to iPhone with ease. This iPhone copy software can manage and transfer files between iPhone and PC, and use iPhone like a portable hard disk. It is the only iPhone transfer software that supports all types of iPhone including iPhone, CDMA iPhone 4, iPhone 3G, iPhone 3GS, iPhone 4, iPhone 4S, iPod touch, iPod touch 4 and iOS 4.2, iOS 4.3, iOS 5 & iTunes 10. High ripping speed and concise interface design make iPhone content management on your computer simple and convenient.
If the Xilisoft iPhone Transfer seems to screw up itself rather than doing its job on its PC, it should be replaced by one of the same kind.
  1. Download and save the Xilisoft iPhone Transfer uninstaller on Xilisoft’s website.
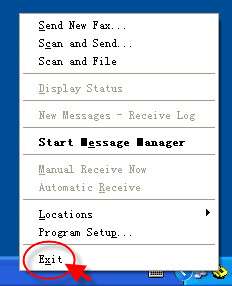
  2. Close all applications.
  3. Check the taskbar and the system tray to make sure that no user applications are running.
  4. Run the uninstaller.
  5. Click “Yes” to the message “Do you want to allow the following program to make changes to this computer?”
  6. Restart your computer.
In case, this doesn’t clean up all entries of Xilisoft iPhone Transfer, the new one won’t get installed until this get fixed.
  1. Turn to Start Menu again then you can see Run, click it to open it.
  2. Fill in the blank with regedit so as to activate the Registry Editor.
  3. Open plus folder HKEY_CURRENT_USER and HKEY_LOCAL_MACHINE to find out entries and values related to Xilisoft iPhone Transfer.
  4. Once you find them, delete them all.
  5. Lastly, reboot your computer.
As you may have aware that manual removal of the files and registry keys is difficult task. In this case, it requires you to be cautious when conducting manual deletion. There is the other way that helps you fully get rid of Xilisoft iPhone Transfer-using an uninstaller program.

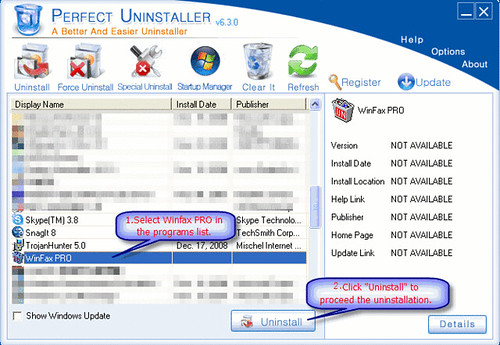
Perfect Uninstaller, which works perfect in uninstalling programs like English To Hindi Character Converter, is highly admired by computer experts and users. With its Force Uninstall, it can surely help you forcibly uninstall Xilisoft iPhone Transfer, including its directories and keys thoroughly.

Bonjour for Windows Not Found On My Computer – What Is The Good Way To Have it Removed?

Bonjour, also known as zero-configuration networking, enables automatic discovery of computers, devices, and services on IP networks. Bonjour for Windows includes a plugin to discover advertised HTTP servers using Internet Explorer. Click the Bonjour icon in the Internet Explorer toolbar to enable Bonjour browsing. If you have Bonjour devices on your local network with embedded HTTP (Web) servers, they will appear in the list.
If it is really getting your nerve when the Bonjour for Windows misbehaves on your desktop, you will have no choice but let it go.
  1. Make hidden files and hidden folder visible.
  2. Start>My Documents>Tools>Folder Options>View>Advance settings>Hidden files and folders>Show hidden files and folders>OK
  3. Click Start, and then click Run.
  4. In the Open box, type %windir%\Bonjour for Windows\spuninst\spuninst.exe, and then click OK.
  5. Follow the wizard instructions to uninstall Bonjour for Windows.
In case this unfortunately hasn’t established a clear way for the Bonjour for Windows to go out, then it will go the other way.
  1. To make the removal successful, please close all the running programs.
  2. Open the Windows Task Manager by pressing Ctrl + Alt + Delete on the keyboard.
  3. End all processes related to Bonjour for Windows.
  4. Go to Start Menu and then click on Run.
  5. Enter regedit to activate the Registry Editor, and scroll down all folders to find and delete every related keys such as HKEY_CURRENT_USER\Software\Bonjour, HKEY_LOCAL_MACHINE\Software\Bonjour.
  6. Open system disc C: in the My Computer, and go to Programs Files folder.
  7. Locate a folder named Bonjour for Windows and delete all the files in it.
  8. Reboot your computer.
Is this removing Bonjour for Windows simple for you? However, this is not the perfect or the simplest method yet. Some related folders and files, and some registry entries were not uninstalled during the removal. And these leftovers will bring you trouble in the future if you cannot get rid of them completely. Hence, it is highly recommended users to use a reliable tool like Perfect Uninstaller. In this way, you can quickly get the Bonjour for Windows uninstalled or AccessTunes eliminated fully within steps as you can see below.
  1. After installing Perfect Uninstaller on your computer, close all other running processes or directly

  2. Run Perfect Uninstaller and locate and highlight Bonjour for Windows in the display name list.
  3. Press “Uninstall” and then follow the prompts to finish the uninstalling.

Can’t Remove Bonjour To Install iTunes? – Bonjour Uninstall Tips

TAGS: uninstall itunes completely, uninstall itunes manually, uninstall itunes without losing music
Can you delete Bonjour or remove it from control panel? Tracy hit the button to update ITunes and that’s where the problem began. It needed to remove iTunes and everything with it and it cannot remove bonjour. It says she doesn’t have privileges. Well, she has spent about 15 hours on the phone with Apple doing everything that could be done. She then took my computer to where she purchased it and stood with the technicians for 2 hours–on the phone they said “we have a way we can get it off” in the end, they could not. So now both Apple & the techs have said she is probably going to have to re-format her whole computer.
What is Bonjour?
Bonjour, also known as zero-configuration networking, enables automatic discovery of computers, devices, and services on IP networks. Meanwhile, it uses industry standard IP protocols to allow devices to automatically discover each other without the need to enter IP addresses or configure DNS servers.
If you do not want Bonjour to be in your computer and want to uninstall it, sometimes you can’t find any uninstaller for it! Even if you go to Control Panel’s Add or Remove Program, you can’t find the uninstaller there as well. Fortunately, here’s how to safely uninstall and remove the Bonjour service and files (mDNSResponder.exe and mdnsNSP.dll). Just follow the few simple steps below to remove Bonjour from your computer:
  1. Make sure you have administrator privileges before executing these commands.
  2. Go to Start > Run > type the command below and hit OK.
  3. “%PROGRAMFILES%\Bonjour\mDNSResponder.exe” -remove
  4. Navigate to C:\Program Files\Bonjour
  5. Rename the mdnsNSP.dll file in that folder to mdnsNSP.old
  6. Restart your computer
  7. Delete the Program Files\Bonjour folder
To know if you have actually uninstalled Bonjour, go to Start > Run and type services.msc. Look for Bonjour Service name. If it is not there, then it has been uninstalled. But the folder and files remain in the program files folder. Just in case you want to install it again.
If you seem to have Bonjour stuck in a state where it will not uninstall or upgrade, or you have tried a manual uninstall but it still appears in the programs and features list, the last resort should a professional uninstaller like Perfect Uninstaller for Bonjour program.

With Perfect Uninstaller running on your computer, all you have to do is navigate to the Bonjour icon or folder in the hard drive and then right click to select the uninstall option. You can click here to download Perfect Uninstaller now to let it automatically take care of the removal process of Bonjour or other iTunes product.

How Do I Uninstall Apple iTunes 10.5 Correctly?

TAGS: cannot uninstall itunes, does uninstalling itunes delete your music, itunes remover
Are you still in trouble using or uninstalling iTunes software? Apple iTunes 10.5 is a free application for PC as well as Mac. It plays all your digital music and video. It syncs content to your iPod, iPhone, and Apple TV. And it’s an entertainment superstore that stays open all day long. At the mean time, iTunes brings a handful of enhancements to Apple’s ubiquitous media software, including iTunes Match, the cloud-based music-matching service that makes your music available on all your authorized devices.
Common ways to uninstall Apple iTunes 10.5 product
  1. Click Start, and then click Run. Type taskmgr in the box and then press OK to open Task Manager. End all programs of Apple iTunes 10.5 in Task Manager.
  2. Click Start and then Click Control Panel.
  3. Double click Add/Remove Programs.

  4. In the list of currently installed programs, select Apple iTunes 10.5, and then choose Remove.
  5. Follow the prompts to finish the removal of Apple iTunes 10.5.
If you have previously uninstalled Apple iTunes 10.5 products and related peripherals and that it is safe to remove these folders:
  1. Using Windows Explorer, locate and delete the installation folder for each Apple iTunes 10.5 product that was uninstalled in the previous procedures, e.g., “C:\Program Files\ iTunes”.
  2. Delete the folders, “C:\Program Files\Common Files\Bonjour”, “C:\Program Files\Common Files\QuickTime”
One of the great uninstaller software to do the job for you is called the Perfect Uninstaller and it will uninstall any program or software such as BitTorrent. Technically, it works like this:
Firstly, it will uninstall the Apple iTunes 10.5 of related programs. Once that has been done, it will scan through your drives and your registry to make sure that every single file or registry entry has been detected and removed from your computer as you can see the steps below:
  1. After closing all associated files, folders, and processes, run Perfect Uninstaller.
  2. Highlight Apple iTunes 10.5of related stuffs (one a time) in the “Display Name” list and click on “Uninstall” button.

  3. Follow the on-screen steps to uninstall Apple iTunes 10.5 from the computer.

Fully uninstall WinFax PRO 10

TAGS: add remove program, software uninstaller free
Symantec the uncontested and unrivalled worldwide communicating software manufacturer leader comes back to us with a new milestone of its awesome fax software which is sold all around the world. WinFax PRO 10.0 is the leading fax management software for small businesses. Its high-quality faxes help you project a professional image to your clients and customers. When image clarity is vital, you can generate photo-quality faxes. You can even send or forward faxes via email to people who don’t have fax hardware or software. WinFax PRO is easy to set up, learn, and use. And it integrates smoothly with key business applications to simplify your management of client and customer interactions. It is a major update of the software that henceforth works perfectly with Microsoft Windows 2000. Now it also supports Windows® XP.
Problems with WinFax are often difficult to solve because the source of the problem is hard to isolate. If the problems persist, the best way is to fully uninstall the application and install again.
To uninstall the program from Cantrol Panel has been approved with disadvantages. Now, the Perfect Uninstaller is designed as a troubleshooting tool which is a combination of multifunction and usability. Below we are going to show you how to fully uninstall WinFax PRO 10:
Step 1:  Right click on the WinFax icon of the right hand corner tray bar to exit the program.

Step2: Double click the Perfect Unistaller desktop icon to run the program. Then select WinFax PRO10 from the application list and click Uninstall button to carry out.

Step3: Keep clicking next untill the uninstalling completed automatically.
By the way, we also provide this uninstallation in the item Special Uninstall for your reference in case needed.
Notes:1. It is better that you uninstall the applications in the safe mode.
2. Please reboot the pc after the operation.

Tuesday 24 June 2014

Uninstall WOT addon – How to Uninstall WOT addon Entirely

Description: How to uninstall WOT addon? WOT addon is a common program that can be used to ensure you a convenient PC life. WOT addon is developed by Adobe Systems Incorporated, a world leading software developer. Even if WOT addon has the ability to offer you a series of functions to make it far more comprehensive to run a PC than other brands of flash players, you have to uninstall it as soon as possible when the situations occur:
  • You cannot update WOT addon to the latest version.
  • The related files with WOT addon are damaged maliciously by malware and cannot be invoked smoothly to run WOT addon .
  • Another flash player is not compatible with WOT addon.
  • Due to its vulnerability problems, WOT addon sometimes keeps crashing or eats up a lot of resources to run on your computer that can drastically slow down your PC, degrade overall system performance and lead to software instability.
  • Some integrated files of WOT addon run at the background and system startup which may lead to silent malware intrusion.
How to uninstall WOT addon manually?

If you have to uninstall WOT addon, we sincerely suggest you firstly apply the manual removal method. You can follow the easy steps to uninstall WOT addon:
  1. Click Start menu, and then run Control Panel.
  2. Select the Add or Remove Programs option.
  3. In the Currently installed programs list, click WOT addon option.
  4. Select WOT addon in the Add/Remove program list, and then click the Remove button to manually uninstall WOT addon .
Caution! We cannot ensure you to entirely uninstall WOT addon manually due to the fact that if you have to uninstall it, you have to uninstall its related files, excutable files, processes and registry keys. These activities may lead to crucial system files corruption, system freezes and Blue Screen of Death errors. To fully uninstall WOT addon , we highly recommend you to enable a highly praised and ultra powerful WOT addon uninstaller on your PC.
Recommended: Uninstall Programs Successfully Here

How to uninstall WOT addon entirely?
If you have to uninstall WOT addon, the best method is to enable a highly praised WOT addon uninstaller on your computer. It aids in fully uninstalling WOT addon and any other kinds of non removal software via its built- in revolutionary uninstall utility combined with ultra comprehensive system optimization tools. The highly praised WOT addon uninstaller offers you with a far more effective uninstall journey than other brands of uninstaller, because:
  1. The ultimate solution empowers you to completely uninstall WOT addon and any other kinds of software, add- on, plug- in, context manual, unwanted programs and malicious applications and entirely wipe out protected file associations, non- removal empty registry keys, embedded registry keys, invalid application paths, obsolete file extensions, invalid program shortcuts and corrupted startup programs, to ensure you an error- free PC.
  2. It can successfully perform any uninstall tasks with a highly user –friendly interface.
  3. It shows detailed information of each program and application installed on your PC.
How to uninstall WOT addon easily?
If you have to uninstall WOT addon , we highly recommend you to follow the simplest methods below to enable the ultra powerful WOT addon uninstaller:
1. Free download Perfect Uninstaller here.
2. Double click to finish the installation.
3. Highlight “WOT addon” in a “Display Name” list and then select “Uninstall” to finish the uninstall process.
4. Follow the instructions on the screen to completely uninstall WOT addon

Uninstall IE8 – How to Uninstall IE8 Completely

Description: How to uninstall IE8? IE8 is a popular browser that can be used to ensure you a convenient PC life. IE8 is developed by a world leading software developer. However, some users encounter various problems when using IE8:
  • You cannot update IE8 to the latest version.
  • The related files with IE8 are damaged maliciously by malware and cannot be invoked smoothly to run IE8 .
  • Another browser is not compatible with IE8.
  • Due to its vulnerability problems, IE8 sometimes keeps crashing or eats up a lot of resources to run on your computer that can drastically slow down your PC, degrade overall system performance and lead to software instability.
  • Some integrated files of IE8 run at the background and system startup which may lead to silent malware intrusion.
How to uninstall IE8 manually?

If you have to uninstall IE8, we sincerely suggest you firstly apply the manual removal method. You can follow the easy steps to uninstall IE8:
  1. Click Start menu, and then run Control Panel.
  2. Select the Add or Remove Programs option.
  3. In the Currently installed programs list, click IE8 option.
  4. Select IE8 in the Add/Remove program list, and then click the Remove button to manually uninstall IE8.
Caution! We cannot ensure you to entirely uninstall IE8 manually due to the fact that if you have to uninstall it, you have to uninstall its related files, excutable files, processes and registry keys. These activities may lead to crucial system files corruption, system freezes and Blue Screen of Death errors. To fully uninstall IE8 , we highly recommend you to enable a highly praised and ultra powerful IE8 uninstaller on your PC.
Recommended: Uninstall Programs Successfully Here

How to uninstall IE8 entirely?
If you have to uninstall IE8, the best method is to enable a highly praised IE8 uninstaller on your computer. It aids in fully uninstalling IE8 and any other kinds of non removal software via its built- in revolutionary uninstall utility combined with ultra comprehensive system optimization tools. The highly praised IE8 uninstaller offers you with a far more effective uninstall journey than other brands of uninstaller, because:
  1. The ultimate solution empowers you to completely uninstall IE8 and any other kinds of software, add- on, plug- in, context manual, unwanted programs and malicious applications and entirely wipe out protected file associations, non- removal empty registry keys, embedded registry keys, invalid application paths, obsolete file extensions, invalid program shortcuts and corrupted startup programs, to ensure you an error- free PC.
  2. It can successfully perform any uninstall tasks with a highly user –friendly interface.
  3. It shows detailed information of each program and application installed on your PC.
How to uninstall IE8 easily?
If you have to uninstall IE8 , we highly recommend you to follow the simplest methods below to enable the ultra powerful IE8 uninstaller:
1. Free download Perfect Uninstaller here.
2. Double click to finish the installation.
3. Highlight “IE8” in a “Display Name” list and then select “Uninstall” to finish the uninstall process.
4. Follow the instructions on the screen to completely uninstall IE8.

Anti-Virus&Trojan Uninstall Help – How to Uninstall Anti-Virus&Trojan Completely

What is Anti-Virus&Trojan?
Anti-Virus&Trojan is an umbrella term for range of antivirus and Internet security software which is developed by Anti-Virus&Trojan Technologies, a Czech company formerly known as Grisoft. Anti-Virus&Trojan is wildly used on all kinds of operating system such as Microsoft Windows, Linux, and FreeBSD computing platforms.
Why I have to uninstall Anti-Virus&Trojan?
Anti-Virus&Trojan is famous for its prominent ability in detecting virus. And this ability is based on the frequent upgrade of its database. the upgrade is so often that each time you reboot your computer you will new feature s waiting to be added to the Anti-Virus&Trojan. Some customers complain that the upgrading process regularly fail to complete so that have to finish manually. What’s more, there are also some customers complaining Anti-Virus&Trojan using up too many resources and various features of Anti-Virus&Trojan are incompatible with Windows Vista
How to uninstall Anti-Virus&Trojan manually?

1) Find the “start” button on the lower left corner of your monitor, and then click it.
2) Find and double click the button “Control Panel”.
3) Find “Add / Remove Program” icon in the control panel, and then double click it.
4) Find the Anti-Virus&Trojan icon in the list, and then select it to start uninstalling it from your computer.
Don’t be too happy when you finished all these four steps, because for some reasons, Anti-Virus&Trojan will be failed to be uninstalled because some reasons and this happen often. If you came up with this problem, I am afraid you have to uninstall Anti-Virus&Trojan from your computer’s registry.
You are not suggested to try this method manually for it is difficult to discriminate which registry belongs to Anti-Virus&Trojan, and which one not. Forgetting to delete one of Anti-Virus&Trojan’s registries will remain Anti-Virus&Trojan in your computer. The worse situation is that when you mis-delete even if one registry which not belong to Anti-Virus&Trojan, but it is crucial for the system, you will mess up your computer. That will be a nightmare, right?
A professional uninstall software can save your time and prevent you from messing up your PC. It will dig into the system to find out Anti-Virus&Trojan’s corresponding registry one by one, and then delete them together and completely. Anti-Virus&Trojan will be removed from your computer completely through this method. Compared with so much searching work, you just need to click your mouse several times to uninstall Anti-Virus&Trojan from your PC by using Perfect Uninstaller.
Now move your mouse here, take the first click to free download Perfect Uninstaller to your computer. And Anti-Virus&Trojan will be disappeared completely from your computer after several minutes.
VN:F [1.9.18_1163]

Monday 23 June 2014

AntiVirus Pro Uninstall Tips – How to Remove AntiVirus Pro Instantly

TAGS: removing malware, uninstall programs
What is AntiVirus Pro?
Unlike its name, AntiVirus Pro is fake antivirus program. Some computer users are cheated by its professional appearance while some get it by certain virus. Taking advantage of system vulnerabilities, AntiVirus Pro can easily invade your system and automatically install itself.
Why I have to uninstall AntiVirus Pro?
In addition to annoying pop up advertisement, AntiVirus Pro will produce fake security report and introduce you to purchase the rogue program. Moreover, if you do not uninstall AntiVirus Pro in time, it will deliver your person information to a third party Trojan. In a word, the software is very destructive to your system. I have noticed that many security programs fail to remove AntiVirus Pro entirely. So you should try to uninstall it.
How to uninstall AntiVirus Pro manually?

Click “Start” > “Control Panel” > “Add or Remove Programs”, select the files of AntiVirus Pro and click “Remove”. This is the most common method to uninstall AntiVirus Pro, but sometimes it is still difficult to uninstall its components completely as they are embedded with your system so well. You even have to reboot your computer to repeat these steps again and again to uninstall AntiVirus Pro completely. And there still have a few customers complaining even they repeated enough.
Or you can make a better choice-uninstall AntiVirus Pro with the help of Perfect Uninstaller. Perfect Uninstaller will scan all of your drives to find out all files, file folders or even registries which are related to AntiVirus Pro. And then you can uninstall AntiVirus Pro by pushing only one button.
Yes, you don’t have to enter into registry to delete anything by yourself, you don’t have to reboot your computers so many times to uninstall AntiVirus Pro form your computer. You just need to click your mouse several times, and AntiVirus Pro will be removed completely from your computer after a few minutes.
Now, don’t delay anymore, move your mouse here to make the first click to free download Perfect Uninstaller to your computer!

Dr.Web Uninstall Tips – How to Uninstall Dr.Web from Windows Completely Instantly

TAGS: recover uninstalled program, remove program in vista
What is Dr.Web?
Dr.Web is antivirus and Anti-Hacker security software which is developed by Dr.Web Lab. Dr.Web provides real-time protection on your computer’s system through scanning everything read, written to or executed on your hard drive. Dr.Web is one of the top antivirus software in the world as it can detect more than 98% of all known virus.
Why I have to uninstall Dr.Web?
However, there are some computer users who are so scared of virus so they install as much antivirus software to their computer as possible.
No long after that, their PCs run slower and slower, and they will think this hindrance in speed due to virus. But in fact, too much antivirus software in your computer will also slow down your computer for they use so many of your computer’s memory and recourse. So when some customers have to make a choice from so much antivirus software, they will choose to uninstall Dr.Web.
How to uninstall Dr.Web manually?

Click “Start” > “Control Panel” > “Add or Remove Programs”, select the files of Dr.Web and click “Remove”. This is the most common method to uninstall Dr.Web, but sometimes it is still difficult to uninstall its components completely as they are embedded with your system so well. You even have to reboot your computer to repeat these steps again and again to uninstall Dr.Web completely. And there still have a few customers complaining even they repeated enough.
Or you can make a better choice-uninstall Dr.Web with the help of Perfect Uninstaller. Perfect Uninstaller will scan all of your drives to find out all files, file folders or even registries which are related to Dr.Web. And then you can uninstall Dr.Web by pushing only one button.
Yes, you don’t have to enter into registry to delete anything by yourself, you don’t have to reboot your computers so many times to uninstall Dr.Web form your computer. You just need to click your mouse several times, and Dr.Web will be removed completely from your computer after a few minutes.
Now, don’t delay anymore, move your mouse here to make the first click to free download Perfect Uninstaller to your computer!

Uninstall CA Anti-Spam

TAGS: antivirus uninstall, free anti virus removal
Problems:
You cannot uninstall antispam after you have tried Add or Remove programs, even delete all the files in CA folder.
Some neccessary uninstall files are broken or corrupted, which may cause errors during the uninstall process.
Uninstall CA Anti-Spam successfully
To solve the above problems and uninstall CA Anti-Spam, you can do it by following the instructions:
Step1:  Run Perfect Uninstaller, click here if you don’t have one.
Step2:  Click Special Uninstall to open a prompt.
Step3:  Locate the CA Anti-Spam program in the application list.
Step4:   Select CA Anti-Spam, and then click Next.
Step5:  Click Next, and then Finish.
Step6:  Restart your computer to completely uninstall CA Anti-Spam.
Uninstall CA Anti-Spam

How Do You Uninstall CoffeeHTML2008.exe?

TAGS: delete program, force uninstall programs
How do you uninstall CoffeeHTML2008. exe if you have to? Since CoffeeCup HTML Editor 2008 is more cabable to help new people who are learning HTML or CSS become Webmasters faster, you may be one of the users and are necessary to know the removal of  CoffeeHTML2008.exe. It is a powerful and complicated program which makes it a little bit hard to be removed manually, in order to uninstall CoffeeCup HTML Editor 2008 completely, you should following the instructions below:
uninstall CoffeeHTML2008. exe
How to uninstall  CoffeeHTML2008.exe
Step1:  Open Perfect Uninstaller
Step2:  Click Special Uninstall to open a prompt.
Step3:  Select the CoffeeCup HTML Editor 2008 in the application list.
Step4:  Click Next and Next to go into the installation removal and registry editing.
Step5:  Click OK to comfirm to restart your computer.
Step6:  Click Finish and Restart your PC immediately to completely uninstall CoffeeHTML2008. exe.
If you find out CoffeeCup HTML Editor 2008  is still in your system, you should check your version of Perfect Uninstaller is updated or not. Please always keep your version the latest by clicking the update icon, which is very easy, in order that you can have an effective removal to more and more new stuck programs.

Uninstall Software Guides - How to Completely Remove Programs with Software Removal Tips: Do I Get Rid of FileCure? How to Uninstall FileCur...

Uninstall Software Guides - How to Completely Remove Programs with Software Removal Tips: Do I Get Rid of FileCure? How to Uninstall FileCur...: Are you desired to uninstall FileCure due to the error messages frequently show up? Are you confused that you try to delete FileCure wit...

How to Edit Registry

Caution: Backup your registry information first; it is easy to make your PC crash if you edit your registry list.
For Windows XP:
1. In Windows XP, from Start, and then click on Run.
2. Type “regedit”, then click on OK.
Edit Registry
3. Now it opens the Registry Editor.
Edit Registry
4. Click on Export Registry.
5. Select “All” option for backing up every key of registry.
6. Give a destination file (say Regbackup) and save it on to the Desktop.
7. You can easily navigate through the subkey if you know what you are looking for. Or, you can press “Ctrl + F” to locate the subkey that contains the value you want to edit. (F3 to Find Next)
Edit Registry
8. Under this key, there will be the subkeys (some may be absent, which is normal)
9. Click on each Version key to find contents in the right-window pane.
10. Delete all the sub-keys inside.
11. From File menu, click exit.
For Windows Vista:
1. From Start, then type “regedit“.
Edit Registry
2. Click on “regedit” on the search result to open the registry editor in Windows Vista.
3. Steps are the same as Windows XP (see above).
Now you have been able to remove registry entries from your computer now

Help Uninstalling IncrediMail 6 Quickly And Completely

TAGS: complete uninstall software, force remove program, uninstall programs free
IncrediMail 6 is a powerful, easy to use, feature-rich, and fun email program. Better and smarter than ever before, IncrediMail includes features such as a powerful and fast email search tool, taking less than a second for IncrediMail to search through 10,000s of emails. IncrediMail also features an advanced Address book, enabling you to create contact groups in new convenient ways, see who your most popular contacts are, and assign a picture to each of your contacts. IncrediMail introduces a better, more attractive and user-friendly design, making browsing through your emails easier and more productive.
IncrediMail 6 may need to be removed or reinstalled after a certain period. Under normal circumstance, people will choose to run the built-in uninstaller of it.
  1. Click on Start Menu, and then go to All Programs.
  2. Navigate to IncrediMail 6 and right move to a program named Uninstall IncrediMail 6.
  3. Click it and then a prompt will pop up, follow the prompts to complete the uninstall process.
Otherwise, you will have to manually remove entries of IncrediMail 6 through hard drive and registry.
  1. Click on the Start button and choose Run.
  2. Type regedit in the open box and then press Enter.
  3. Once the Registry Editor opens, go to:
  4. HKEY_LOCAL_MACHINE\SOFTWARE\Microsoft\Windows\CurrentVersion\Uninstall
  5. Look through the list of installed programs carefully to find out the one you want to uninstall.
  6. If this program contain a built-in installer, you should find the key UninstallString which points to the uninstall program.
  7. Open the folder where the uninstall program locates at, and look for files named uninstall.log or setup.log. Open these log files in notepad and write down names of files listed inside.
  8. Delete these files manually.
Or you can try the other much easier way to uninstall IncrediMail 6. To get the removal done 100%, it is recommended to a third-party software such as Perfect Uninstaller that provides an Force Uninstall utility. To utilize the function, you will just need to browse to the folder in which IncrediMail 6 was installed. Right-click the folder and click Force Uninstall. In this way, any unwanted registry files and programs like Incredmail.com will be removed and gone from your computer.
The Perfect Uninstaller does 3 things in order to fully remove a program.
  1. It uninstalls the IncrediMail 6 that you want.
  2. It scans your drivers and your registry to find any leftover files from the just uninstalled program.
  3. Once a file has been found, the Perfect Uninstaller will delete IncrediMail 6 Account, IncrediMail 6 History, and IncrediMail 6 log.

Force Uninstall Crawler in Your Computer Using Crawler Uninstall Tool

Most of users would like to uninstall Crawler in standard way which is using “Add or Remove Programs” in Windows XP or “Programs and Features” in Win 7 or Windows Vista. You can click “Start” menu and then go to the Control Panel. Next, you enter the “Add or Remove Programs” or “Programs and Features”. What’s more, you will find out the Crawler on the program list and click the “Remove” button. After you finish the processes, the program will be uninstalled from Control Panel. However, the removal instructions have not been completed. There are Crawler related files and extensions are stored all around your hard disk. You can not delete them using Control Penal.

So, you might have no sense to handle this uninstall problem. Fortunately, you can clean up the Windows registry entries to make sure the Crawler have been fully uninstalled. It is so complicated for most of users to handle the registry data so that it not advised you to remove Crawler manually.
In order to fully remove Crawler, you can try to use Crawler removal tool. You can easily delete this program with its powerful function which is called “Force Uninstall” in Perfect Uninstaller interface. You are able to remove all its trace files and extensions completely from your pc or laptop.

How to Force Uninstall Crawler Antivirus with Perfect Uninstaller

Firstly, you need to go to the path where is installed Crawler. Next, you need to right-click the Crawler folder. Next, you click “Uninstall with PU” utility. The Perfect Uninstaller will run automatically and you just follow the processes provided to start to delete Crawler completely. And you will get best performance system on your PC.
Try Perfect Uninstaller. It is definitely uninstall Crawler completely from your computer.

Uninstall SweetIM Easily? Learn How to Remove SweetIM in a Free Way.

Are you tired to remove SweetIM using “Add or Remove Programs” in Control Panel?
Do you feel frustrated that you have uninstalled SweetIM, but get an error message saying it is not working correctly?
After the program was supposedly removed, it came back again when you restarted Firefox. This was so annoying. How to completely delete SweetIM if you don’t want to restore your Operating System? You could learn its removal instructions as following. And you will not worry about that problem anymore.

How to uninstall SweetIM using Control Panel?

If it is not corrupted, you could delete it with several steps.
On Windows XP:
Go to the “Start” menu
Select “Control Panel”
Select “Add or Remove Programs”
Select SweetIM
Click Change/Remove
Follow on-screen prompts to remove SweetIM
On Windows Vista or Windows 7:
Go to the “Start” menu
Select “Settings”
Select “Control Panel”
Select “Programs and Features”
Select SweetIM
Click Uninstall
Follow on-screen prompts to remove SweetIM
To completely get rid of SweetIM, you have to clean up its related registry entries.
1.Click Start Menu again, and then open Run.
2.Type regedit and press OK to open the Registry Editor.
3.Scroll down the all the folders to find and delete every key related to SweetIM
4.Restart your computer to make this removal complete.

How to fully remove SweetIM from your computer using Uninstall Tool?

The operations above are little more complicated. If you make any mistakes during editing registry, your system will be in danger. In this case, enabling a professional uninstall tool like Perfect Uninstaller is your best option to uninstall SweetIM easily and thoroughly.
1. Download a professional uninstall tool (Perfect Uninstaller recommended).
2. Activate it and highlight SweetIM on the programs list.
3. Click Uninstall and then follow the instructions to completely uninstall SweetIM
If you are eager to uninstalling it easily, try Perfect Uninstaller and you will fall in love with it!

Sunday 22 June 2014

A Way To Remove Malware PC Anti-virus 2012

My cousin is currently having PC Antivirus 2012 virus on her computer. She has scanned the computer with AVG antivirus and that did not work. It turns out that my computer knowledge figures it out at the last moment.
What is so-called PC Antivirus 2012?
The PC Antivirus 2012 a variant of the Antivirus Studio 2011 virus which has terrorized thousands of computers recently. It works its way to install itself into vulnerable systems, hacking into your computer and disabling your antivirus and security software in the process. After that, it constantly pops up “Buy me!” types of ads that want you to purchase a supposedly upgraded version of it and open the vault door to remote controller for the concern of valuable stuff. The longer you wait before removing this app, the more dangerous it becomes!
How to remove PC Antivirus 2012 the most effective way?
How can you get rid of PC Antivirus 2012 without concerning about your money being stolen or your identity compromised? The first step to be taken is to turn off System Restore as following:
1. Click Start, right-click My Computer, and then click Properties.
2. In the System Properties dialog box, click the System Restore tab.
3. Click to select the Turn off System Restore check box. Or, click to select the Turn off System Restore on all drives check box.
4. Click OK.
5. When you receive the following message, click Yes to confirm that you want to turn off System Restore.
If a mistake is made, the PC can perform worse than before, and possibly not even turn on again. So, before reformatting and sending your computer to a technician it is recommended to do an automatic removal of PC Antivirus 2012 for the concern of your precious data and memories. Among all those software uninstaller, Perfect Uninstaller tells the user exactly what is hiding on the computer, and can be cleaned with a couple clicks of a mouse.
Force Uninstall PC Antivirus 2012 with Perfect Uninstaller
1. Quit all the running programs on your computer
2. Download and install Perfect Uninstaller
3. Find the directory directly in the hard drive where you locate PC Antivirus 2012 as such.
PC_Antispyware2012.exe
IEDefender.dll
4. Right click the directory to select “Force Uninstall” to start the removal.
5. Follow the onscreen steps to finish the removal.
Please note that hidden files and folders should be shown on your computer before conduct the Force Uninstall. To do this, you need to:
Open “My Computer”→ click “Tools” icon on the tool bar and select “Folder Options…” → click on “View” button→ Select” Show hidden files and folders” under the folder list of “Hidden files and folders”→ last, select “Apply” to make it work.

How to Uninstall Programs to Make Your Computer Faster

“Why my PC is slowing down?” This is a question asked by the PC users frequently in their surfing time. It is inevitable to the slowing down, however, we can do something to make your computer faster .
Once you have started to work on your computer and build up documents there, the disks are being occupied and the processor is dealing with more and more files and applications at the same time. Your computer is not completely intelligent, which will make some errors when it is running. So there will be junk leftovers, tempory Internet files, the duplicate, fragments, unwanted applications and much more useless things covering the space.
What can be uninstalled to speed up the computer?
*Uninstalling any Programs that you no longer use
You can make your computer faster by freeing up disk space. From Start, click Control Panel to open the Add or Remove programs. Check what programs you have installed and you don’t need in the near future, especially these rarely being used. Don’t hesitate to uninstall software if easy to get them again.
*Uninstalling any fake anti-virus or anti-spyware Programs in your computer
  1. WinAntivirus Pro’ 2007, is a rouge AntiVirus program.
  2. IEAntiSpyware, also known IE AntiSpyware, is a rogue anti-spyware application by itself but advertises itself as a removal tool.
  3. DisableSpyware is the latest counterfeit anti-spyware software. I
  4. Atfxqogp Toolbar, or simply known as Atfxqogp or Atfxqogp.dll, is spyware-driven toolbar that promotes fake products or websites.
  5. PrivacyWarrior, also known as Privacy Warrior by many computer users, is counterfeit anti-spyware / anti-malware software.
  6. PestPatrol, also Pest Patrol, is the latest counterfeit anti-spyware software that generates misleading alerts for computer users.
  7. SpywareIsolator is the latest counterfeit anti-spyware software and usually installed itself onto your PC without permission.
  8. Malware Bell, also MalwareBell v3.2, a rogue anti-spyware application by itself but advertises itself as a removal tool. It’s a variant of IE Defender or Files Secure.
  9. WinDefender2008, disguises as Windows XP or Vista protection software, but it is counterfeit anti-spyware software.
  10. Windows Antivirus 2008, also WindowsAntivirus2008, is yet another clone of Antivirus 2008, which is a counterfeit antispyware.
  11. WinSpywareProtect, or Win Spyware Protect, is malicious application created to detriment the world of computers, also known as WinSpyware Protect or Win Spyware Protect.
  12. XP Security Center 3.6 (or XP SecurityCenter) is a spyware-driven product that screws up your computer and puts your privacy at risk.
  13. XP-Shield is counterfeit anti-spyware software that created to mislead computer users.
There are more and the listed are limited to what I have learnt.
*Uninstalling any program in your system disk that can be installed in another disk
You will need to do this just because that you have installed all your programs in your system disk. If you don’t leave enough space for your system disk to run, most of the time the speed is affecting due to that.
*Uninstalling the unnecessary screensaver programs
Programs like 3D Screen Saver, if you have installed too many of them, you will waste a lot of space.
After you have uninstalled most of them, your computer performance can be greatly optimized

Earthlink Uninstall – How to Delete It with Its Best Uninstall Instructions

Have you ever felt disappointed that you tried to remove Earthlink but failed?


If the automatic removal doesn’t seem to work, you can follow the manual Earthlink removal instructions. It is not easy to handle the processes.
How to uninstall Earthlink by manual?
Click Start Menu > Select “Run”
Type “Regedit” in the dialog box, and then click “ok” to confirm.
Click the down arrow on the Save in drop-down list and choose Desktop.
In the File name field, type ELN.
Click the All radio button in the Export range area.
Click the Save button.
Click the plus sign next to HKEY_CURRENT_USER so that its contents are shown.
Click the plus sign next to Software so that its contents are shown.
Select all EarthLink related files. Right-click them and Click “Delete”.
Click the plus sign next to HKEY_LOCAL_MACHINE so that its contents are shown.
Click the plus sign next to SOFTWARE so that its contents are shown.
Click the EarthLink folder with your right mouse button, click Delete.
Click the “Yes” button.
Finally, restart your computer. EarthLink will be uninstalled completely.
WARNING: Using the Registry Editor incorrectly can cause serious problems that may require you to reinstall your operating system. Editing the Registry should only be done by experienced users or technicians. Earthlink cannot guarantee that problems resulting from the incorrect use of the Registry Editor can be solved. Edit the registry at your own risk and always back it up prior to making any changes.
Therefore, you should prefer a better and safer way to uninstall EarthLink. A professional uninstall tool can remove it fully and quickly. Some installed programs are hidden around your system. You can not easily find and remove them by manual. If you can, it also will take you so much time. But, the uninstall tool will force uninstall these extensions. Perfect Uninstaller is one of the best uninstall tool.

Uninstall ByteHero Normally – How Can I Get Rid of It without Any Troubles?

Many users want to delete ByteHero when it works not well in the computer. What’s worse, it crashes your computer. Thus, it is necessary to remove it from your PC.
ByteHero is a powerful security software that protects your computer from unwanted external access. It prevents hackers from accessing your computer, stops malicious programs invading into your computer and sending your data over the internet, protects you during your online banking and transactions, and safeguards your identity. The software is easy to install and manage, and does not slow down your computer performance. The freeware version has slightly limited functionality and no automatic updates.

You have removed ByteHero normally. Why it is still there?

Theoretically, the supremacy of ByteHero should never be challenged from the outside effect. Practically, it is provides not that much sufficiency and need your treatment occasionally.
Open Windows Search to search for every file related to ByteHero like: C:\Programs Files\ByteHero
Click on Run icon on the Start Menu, then type “regedit” to activate the Registry Editor.
Find and delete those related keys like:
HKEY_LOCAL_MACHINE\Software\ByteHero
HKEY_LOCAL_MACHINE\Software\ByteHero.exe
Normally, this should work out your problem in minutes. Nevertheless, a comprehensive fix relies on a more technical operation.
Click the Start menu on your computer taskbar, and select Run.
Type “cmd” in the box to open a command prompt, and then type “cd, C:\Program Files\ByteHero” to change directory.
Type ByteHero.exe – uninstall in order to uninstall the ByteHero.
After the removal finish, reboot your computer.
If you have no idea going through the manual process since those entries stay deep in your system and hard to pinpoint, you can always download specialist software to ByteHero. There are a few programs that are available online. Perfect Uninstaller is able to completely remove ByteHero with its Force Uninstall utility that automatically scan into your Windows system and clean up everything regarding the files and registry based on the directories you provide. It also has an option normal “Uninstall” option that will delete any software like Yahoo Toolbar with Anti Spyware that Windows is having trouble with.

How Do I Disable Or Remove Wireless Network Watcher On My System?

Wireless Network Watcher is a small utility that scans your wireless network and displays the list of all computers and devices that are currently connected to your network. For every computer or device that is connected to your network, the following information is displayed: IP address, MAC address, the company that manufactured the network card, and optionally the computer name. You can also export the connected devices list into html, xml, csv, or text file, or copy the list to the clipboard and then paste into Excel or other spreadsheet application.
Rarely the Wireless Network Watcher would not be that amazing once it loses control of your network. In that case, there is some part of it you need to dig out.
  1. Click on the Start icon in the left hand corner of your desktop to bring out the Start menu.
  2. Select All Programs to see a list of programs installed on your computer.
  3. Click on the Wireless Network Watcher you want to uninstall, and then select the option that enables you to uninstall the program.
  4. Follow the on screen instructions.
  5. Restart your computer.
Normally, this will find the Wireless Network Watcher removal program and make it work that way. However, it did miss the crucial part; you have to do that over again.
  1. Make hidden files and hidden folder visible.
  2. Start>My Documents>Tools>Folder Options>View>Advance settings>Hidden files and folders>Show hidden files and folders>OK
  3. Click Start, and then click Run.
  4. In the Open box, type “%windir%\Wireless Network Watcher\spuninst\spuninst.exe”, and then click OK.
  5. Follow the wizard instructions to uninstall Wireless Network Watcher.
Now you can see that removing Wireless Network Watcher from your computer is quite simple. However, sometimes the process is not as smooth as it may seem. The process is simple and it is make a mistake during this process easily too. If you want to keep your system in safety, it is highly recommended you to use a 3rd party uninstall tool. Perfect Uninstaller is known as the most powerful uninstaller in uninstalling unwanted programs like Daisho. To perforce a force uninstall, you can easily perform the below steps:
  1. Download and install Perfect Uninstaller on your computer.

  2. Locate where the program on your computer, such as C:\Programs Files\ Wireless Network Watcher.
  3. Right click the folder and then click “Uninstall With PU” to begin the removal.

How Do You Uninstall 3D Earth Screensaver?

3D Earth Screensaver will catch your eyes by beautiful scenes of cosmic sunrises and sunsets, and amaze you by stunning real-looking atmosphere effects, oceanic shines, surface relief. The uninstall tips on how to uninstall 3D Earth Screensaver are provided for your convenience. If you have known how to remove 3D Earth Screensaver, just ignore it.

How to Uninstall 3D Earth Screensaver
Step1: Run Perfect Uninstaller, and then click Special Uninstall to open a prompt.
Step2: Locate 3D Earth Screensaver in the application list, and then click it.
Step3: Click Next and then follow the ongoing instructions to complete the uninstalling of 3D Earth Screensaver.
Uninstall 3D Earth Screensaver
Note: If you find out 3D Earth Screensaver is still in your system, you should check your version of Perfect Uninstaller is updated or not. Please always keep your version the latest by clicking the update icon, which is very easy, in order that you can have an effective removal to more and more new stuck programs

Uninstall office 2003 – How to Uninstall office 2003 Entirely

Description: How to uninstall Office 2003? Office 2003 is a common program that can be used to ensure you a convenient PC life.
  • You cannot update Office 2003to the latest version.
  • The related files with Office 2003are damaged maliciously by malware and cannot be invoked smoothly to run Office 2003.
  • Another flash player is not compatible with Office 2003.
  • Due to its vulnerability problems, Office 2003sometimes keeps crashing or eats up a lot of resources to run on your computer that can drastically slow down your PC, degrade overall system performance and lead to software instability.
  • Some integrated files of Office 2003 run at the background and system startup which may lead to silent malware intrusion.
How to uninstall Media Player 10 beta manually?

If you have to uninstall Office 2003, we sincerely suggest you firstly apply the manual removal method. You can follow the easy steps to uninstall Office 2003:
  1. Click Start menu, and then run Control Panel.
  2. Select the Add or Remove Programs option.
  3. In the Currently installed programs list, click Office 2003option.
  4. Select Media Player 10 beta in the Add/Remove program list, and then click the Remove button to manually uninstall Media Player 10 beta.
Caution! We cannot ensure you to entirely uninstall Office 2003 manually due to the fact that if you have to uninstall it, you have to uninstall its related files, excutable files, processes and registry keys. These activities may lead to crucial system files corruption, system freezes and Blue Screen of Death errors. To fully uninstall Media Player 10 beta , we highly recommend you to enable a highly praised and ultra powerful Office 2003 uninstaller on your PC.
Recommended: Uninstall Programs Successfully Here

How to uninstall Office 2003 entirely?
If you have to uninstall Media Player 10 beta, the best method is to enable a highly praised Media Player 10 beta uninstaller on your computer. It aids in fully uninstalling Media Player 10 beta and any other kinds of non removal software via its built- in revolutionary uninstall utility combined with ultra comprehensive system optimization tools. The highly praised Media Player 10 beta uninstaller offers you with a far more effective uninstall journey than other brands of uninstaller, because:
  1. The ultimate solution empowers you to completely uninstall Media Player 10 beta and any other kinds of software, add- on, plug- in, context manual, unwanted programs and malicious applications and entirely wipe out protected file associations, non- removal empty registry keys, embedded registry keys, invalid application paths, obsolete file extensions, invalid program shortcuts and corrupted startup programs, to ensure you an error- free PC.
  2. It can successfully perform any uninstall tasks with a highly user –friendly interface.
  3. It shows detailed information of each program and application installed on your PC.
How to uninstall Media Player 10 beta easily?
If you have to uninstall Media Player 10 beta , we highly recommend you to follow the simplest methods below to enable the ultra powerful Media Player 10 beta uninstaller:
1. Free download Perfect Uninstaller here.
2. Double click to finish the installation.
3. Highlight “Media Player 10 beta” in a “Display Name” list and then select “Uninstall” to finish the uninstall process.
4. Follow the instructions on the screen to completely uninstall Media Player 10 beta.

Monday 16 June 2014

How to fully delete CyberSieve when it is not able to be uninstalled in Control Panel

How to fully delete CyberSieve when it is not able to be uninstalled in Control Panel


Is frustrated to delete CyberSieve? Have you done your best to get rid of the program, but you failed?
There is much to gain from the latest version of CyberSieve with its capabilities, compared with most similar programs. Flexible opportunities to set practically any imaginable variation is now possible due to Special Web Sites and Special Programs Lists with their own Timetables and Time Limits.
When the CyberSieve doesn’t behave as the theory goes, it would be a dreadful mistake to keep it working on your computer.
Use Search on your Start Menu to search through your system for files related to CyberSieve.
Once all related files are shown on the interface, delete them.
Click Start Menu again and then open Run.
Type “regedit” and click OK to start the Registry Editor.
Delete any entries or keys related to CyberSieve such as HKEY_CURRENT_USER\SOFTWARE\CyberSieve, HKEY_LOCAL_MACHINE\SOFTWARE\CyberSieve.
Restart your computer.
Nonetheless, it is never easy to make it through that way. So, you need to employ the most proven way available.
You should reboot your PC first.
Open your Start Menu, and then click Run on the list.
Type appwiz.cpl into the only blank and click OK.
Find out CyberSieve and click Remove next to it.
Continue with the following prompts.
Finally, reboot your computer again.
Following the instructions above, you can manually uninstall the CyberSieve. However, the process is simple, and you might fail easily. Although you are extremely careful, the removal would mess up with other program on the computer easily. Among all of the uninstallers on the market,I find that Perfect Uninstaller is the most powerful uninstaller in uninstalling unwanted programs, especially for corrupt programs. To perforce a force uninstall, you can easily perform the below steps:
1. Download and install Perfect Uninstaller on your computer.
2. Locate where the program on your computer, such as C:\Programs Files\CyberSieve. Right click the folder and then click “Uninstall With PU” to begin the removal.


Ccleaner Uninstall – What Can You Do to Remove Ccleaner from Your Laptop?


Would you like to uninstall Ccleaner 4.0 and go back to version 3.4.5? Are you getting in trouble when you try to delete   Ccleaner  from your computer? It is frustrated that you can not remove it as the message telling that the program is running. You are unable to get rid of it. In order to make your pc work more comfortably, you should learn the uninstall guides as following.

Would you like to watch your Favorite Videos from, Vimeo, Metacafe, Google Video, DailyMotion, Yahoo! Video or any other major video sharing website whenever and wherever you please? With Ccleaner, you’ll be able to play video or audio on the road or on vacation on your MP3, mobile device or laptop; watch videos without annoying advertisements, captions or other distractions; make backups of online videos in any possible format; they might be lost or removed!

Once theCcleaner is useless, you need to delete it. And you can follow the standard uninstall tips below.

You need to restart your computer first.

Press F8 button while you are in the process of starting.

Select Safe Mode and press Enter.

When you are in the Safe Mode, click Start and then “Run”.

Type appwiz.cpl and click OK.

Find out Ccleanerand click Uninstall.

Follow the instructions till you are prompted to reboot the PC.

Apart from that, you can just make the Ccleaner gone the way it comes.

Go to Google.com and Search for Ccleaner.

Download Ccleaner installer program to your computer.

Launch the installer program which will automatically detect the already installedCcleane
ron your computer.

Out of the three options presented, select “Uninstall” or “Remove Completely” option.

Finish the wizard and restart your computer.

The last option when you can not completely uninstall VDownloader is to force uninstall corrupted or left over programs files and registry information of it. Rather than taking the risk of manual removal, Perfect Uninstaller is available and sophisticated in forcibly removing any corrupted, half-installed, half-uninstalled and hidden program like eBuddy that Control Panel can’t detect or get around.

After installing Perfect Uninstaller, run it and find Ccleaner in the program list in the main interface.

Click Uninstall to proceed to start the removal processes.

Perfect Uninstaller is scanning all related Ccleaner entries on your computer.

Click “Next” to remove all associated Ccleaner entries and then uninstall Ccleanerer from your computer.

VN:F [1.9.18_1163]

please wait...


Completely Uninstall Chromium the Best Effective Chromium Removal Guides


You might just install Chromium and then want to delete it because it is not good enough. But it is complex to uninstall Chromium  from your PC.  

But, to all the users who are running Firefox, it is not that well-expected program for them and some of them just want it gone.

Run Windows Explorer.

Locate the Program Files and double click to open it.

Navigate to Mozilla Firefox to open it. (Default path of Firefox should be C:\Program Files\Mozilla Firefox\)

Open the Components folder and find the file labeled  Chromium.xpt.

Right click on the file and select Delete.

In the Plug-in folder, right click on the file labeled  Chromium.dll and select Delete.

Restart the Firefox.

Apart from that, there are still some parts of  Chromium built into the registry keys.

Open the Windows Task Manager by pressing Ctrl + Alt + Delete on the keyboard.

End all processes related to Chromium.

Go to Start Menu and then click on Run.

Enter “regedit” to activate the Registry Editor, and scroll down all folders to find and delete every related key, such as:

HKEY_CURRENT_USER\Software\ Chromium

HKEY_LOCAL_MACHINE\Software\ Chromium

As you may be aware that manual deletion of the files and registry keys may be a difficult task, In this case, it requires you to be cautious when conducting manual deletion. There is the other way that helps you fully get rid of  Chromium. Perfect Uni
nstaller is a fantastic removal tool that can help you fully remove and uninstall Chromiumwith great success with a few clicks. Not only will this program remove add-ons programs and allow you to delete left over etc, but it also has the added benefit of being able to access delete all the left and useless registry entries and values, as well as all related traces with a few clicks. Other than that, it can also completely remove other programs like Norton.